Monday, August 08, 2011
Wireless bridge with Riger DB108-WL
From my previous post, I've successfully connected my TV the my PC but I want more. I trying to connect my TV to my home main network. But this time I got 2 nearly identical modems (diff. firmware maybe), Riger DB108-WL. This model has a feature call wireless bridge and decided to try it out.After several hours of trial and error, finally, I got it. Below are my settings/configurations that might help others.
Only modem B is connected to the internet through ADSL.
| Modem A Setting | Modem B Setting | * |
|---|---|---|
* |
||
Make sure both modems are on the same channel |
||
Make sure they have same security settings. |
||
Set modem A AP mode as access point, modem B AP mode as wireless bridge, |
After all settings are there, save and reboot both modems.
If all goes well, any device connected to modem b will be bridged to modem A (IP assign by modem A DHCP).
I notice at this point (when the bridge is on) modem B IP is no longer available. I could not find it anymore. The only way to find it (to enter the modem console for example) is to reset it. The modem B LAN port would not help since anything connected to modem B Ethernet port will be bridge to modem A.
Thursday, July 28, 2011
Signing Java JAR Files
From coderanch (http://www.coderanch.com/t/407490/java/java/why-jarsigner)Signing a jar is basically used to verify a trusted source. When you sign a jar with your digital signature (based on your private key), you place a mark into the jar file that could not have been done by anyone but you.
The signature is also a checksum of the Jar file, so if the jar get corrupted or modified in transit, the signature is invalid.
On the other side, your public key is placed into the keystore of the system that trust you. This will be used to verify your signature.
Currently, I believe this is mainly used for applets. Using signed jar files, and setting security properties on client browsers, applets can have access to disk, network, and other stuff that they don't normally have access to.
Step 1 - Create Key
keytool -genkey -keystore <keystorefile> -alias <aliasname>example
C:\folder>keytool -genkey -keystore mykeystore -alias myalias
Enter keystore password:
Re-enter new password:
What is your first and last name?
  [Unknown]:  MyName
What is the name of your organizational unit?
  [Unknown]:  MyOrg
What is the name of your organization?
  [Unknown]:  MyOrg
What is the name of your City or Locality?
  [Unknown]:  MyCity
What is the name of your State or Province?
  [Unknown]:  MyProvince
What is the two-letter country code for this unit?
  [Unknown]:  my
Is CN=MyName, OU=MyOrg, O=MyOrg, L=MyCity, ST=MyProvince, C=my correct?
  [no]:  yes

Enter key password for <myalias>
        (RETURN if same as keystore password):
Re-enter new password:
Step 2 - Export Cert
keytool -export -keystore <keyStoreFile> -alias <aliasName> > <certFile>example
C:\folder>keytool -export -keystore mykeystore -alias mylias > mycert
Enter keystore password:  mypassword
Step 3 - Signing JAR
jarsigner -keystore <keyStoreFile> -storepass <password> <jarFile> <aliasName>example
C:\folder>jarsigner -keystore mykeystore -storepass password my.jar myalias

Warning:
The signer certificate will expire within six months.
Step 4 - Verify
jarsigner -verify -verbose -certs <jarFile>example
C:\folder>jarsigner -verify -verbose -certs my.jar
...
sm       236 Sun Feb 06 21:57:00 SGT 2011 images/remove.png

      X.509, CN=MyName, OU=MyOrg, O=MyOrg, L=MyCity, ST=MyProvince, C=my
      [certificate will expire on 10/26/11 7:46 PM]
...
  s = signature was verified
  m = entry is listed in manifest
  k = at least one certificate was found in keystore
  i = at least one certificate was found in identity scope

jar verified.

Warning:
This jar contains entries whose signer certificate will expire within six months.
Wednesday, July 20, 2011
Samsung LED TV Network Connection

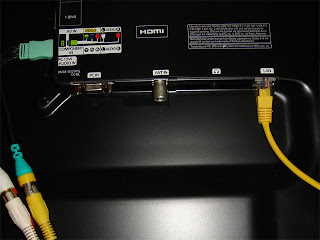
Last week, I bought Samsung UA40D5000PR LED Backlit TV. It comes with wireless LAN adapter support but need to have Samsung LinkStick Wireless USB 2.0 Adapter in order for it to works. It also has an Ethernet port for wired network connection.
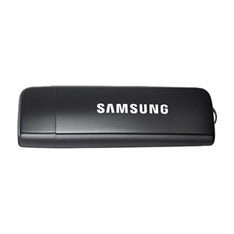
To utilize the network feature, I probably need to buy the LinkStick or lay a network cable from the TV along the way to my computer room.
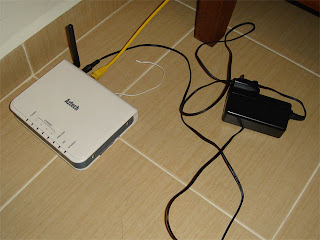
So I'll go with the 3rd option, using old ADSL modem (Aztech DSL605EW) with built-in wireless and 4 Ethernet ports. This is the same modem that I used in previous blog post, broken ADSL circuit.
Reset the modem to factory default setting and set your wireless security accordingly.
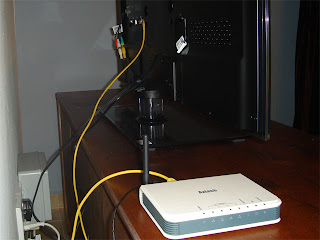
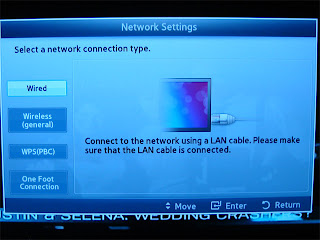
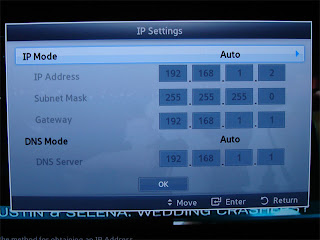
Hook up the TV with the ADSL modem through an Ethernet cable. Set the TV network configuration; let the modem DHCP assign the IP.
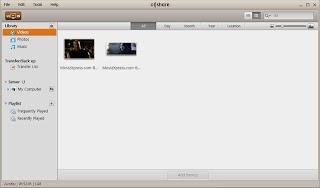
At PC, download Samsung AllShare software, install it and follow the instruction to add video files to it's library.

Next is to connect from PC (from another floor) to the ADSL modem
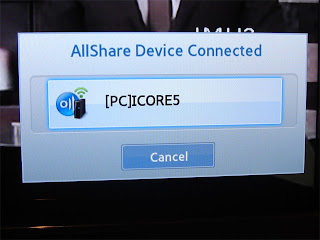
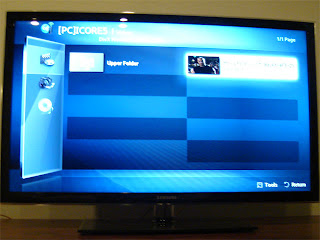
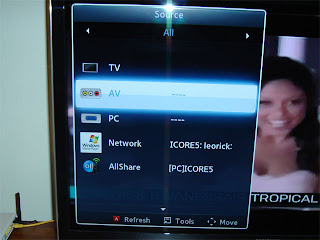
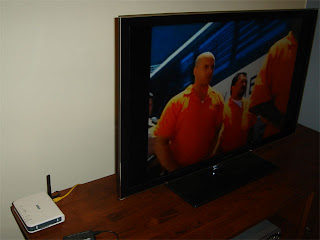
It works. This would be my temporary method to link my TV to my PC.
My next step is to link the TV to not only my PC, but to my home network which linked to my Network Attached Storage that supports DLNA for media sharing. That would be fun.
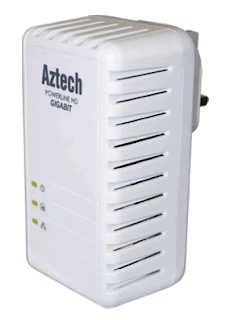
I’m not planning to use WiFi since we have a lot of Wifi Hunter here. I’ll rather go with homeplug but not sure which model/speed to choose. I can see 85Mbps, 200Mbps, 500Mbps and 1000Mbps on the market. Any suggestion?
Sunday, January 02, 2011
Garmin Mobile PC and Nokia E72
Referring to Tinggi Island Travel and Noeman.org on how to link between Garmin Mobile PC and Nokia phone, here is my version of setup and configuration using Nokia E72.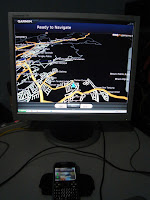
Step 1 - install Garmin Mobile PC.
Step 2 - install ExtGps from Symarctic (to your Phone).
Step 3 - start ExtGps (at your Phone).
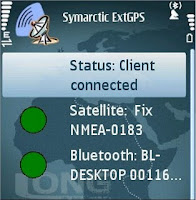
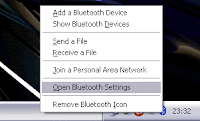
Step 4 - Open bluetooth setting from systray icon.
Step 5 - select your phone, I assume that it has been paired with your PC.
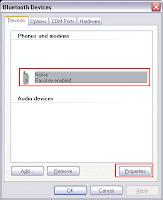
Step 6 - go to the services tab and find SPP, tick the check box and note down the comport number.
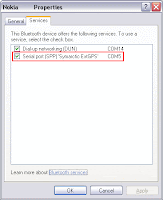
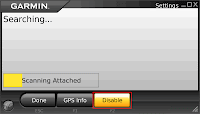
Step 7 - start Garmin Mobile PC and click at the satellite icon.

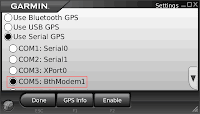
Step 8 - click disable to bring up the device selection radio button.
Step 9 - select the same comport from step 6.
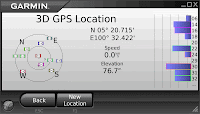
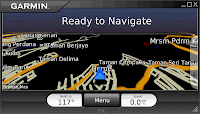
Done, now you are ready to navigate with a larger display.
Of course our could not travel with your desktop turn on.
Get a notebook/netbook.
Saturday, January 01, 2011
Using old Wireless ADSL Modem as a DIY Access Point


My current home network configuration is using ISP supplied ADSL modem that comes without wireless. It connect to a cheap unmanaged switch through a crossover cable and distribute it to 2 PCs.


I also have a broken ADSL modem (Riger DB108-WL) that comes with wireless capability. The only thing is, the ADSL circuit is broken. So this is where this idea comes out. How to use the spare wireless circuit with my current network configuration. I thought it will be complicated but when I give a try, it was not that hard. Just a couple of simple steps will do.
The main idea are to;
- give the wireless device a fix IP
- turn it DHCP server off
- hook it up to the existing switch using crossover cable
- set the gateway IP pointing to the current ADSL modem.
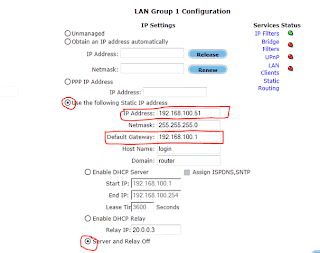
Part 1, to make it easy, just reset the wireless device to factory default through the pinhole. Then hook it directly to your PC using standard network cable. Set its IP for example, my current ADSL modem is set to 192.168.100.1. So the wireless device IP should be set to the same network segment, let say 192.168.100.50. Next, turn of its DHCP server since we want to let the current ADSL modem to control the host distribution. Now save and reboot the wireless device.
Part 2, Now the IP of the wireless device has changed. Disconnect it from your PC and hook it to the switch with crossover cable. Hook your PC back to the switch. Now turn on your wireless device and browse to its web management page. Set the gateway so that it point to the current ADSL modem (in my case, 192.168.100.1).
Now the wireless device is converted to wireless access point and ready to accept wireless connection.
The best part of using this configuration is, you can turn off wireless independently without need to browse the web management page. Just turn the wireless device power off.
**update**
For DSL605EW, please refer to screenshots below.

Subscribe to:
Posts
(
Atom
)


